How To Install Mautic on Ubuntu 24.04

In this tutorial, we'll learn how to install Mautic on Ubuntu 24.04. A open-source for marketing automation. It also covers setting up the recommended PHP version/extensions, configuring Cron jobs for automated tasks, and handling email sending/bounces via SMTP.
Introduction
Mautic is a powerful tool for automating your marketing activities. It allows you to create email campaigns, track leads, and design marketing workflows—all in a self-hosted environment. Installing Mautic on your own server (VPS or dedicated machine) gives you full control and flexibility over your data and integrations.
In this guide, you will learn:
- Which PHP version and extensions are required.
- How to set up Nginx and PHP-FPM for Mautic.
- How to enable and configure SSL (using Let’s Encrypt or another certificate).
- Setting up Cron jobs to handle Mautic’s scheduled tasks.
Prerequisites:
- A Ubuntu 24.04 installed dedicated server or KVM VPS.
- A root user or normal user with administrative privileges.
- A domain name point A record to server's IP
How To Install Mautic on Ubuntu 24.04
1. Server Preparation and Requirements
sudo apt update && sudo apt upgrade -y
PHP Version Requirements
Mautic requires a fairly recent version of PHP. Depending on the Mautic release, PHP 8.1 or later is recommended (PHP 8.1 is often supported by newer Mautic versions, but always check Mautic’s official documentation for the latest recommendations).
Recommended PHP extensions include:
Install PHP and its extensions like this:
sudo apt install php8.3-fpm php8.3-mysql php8.3-gd php8.3-xml php8.3-mbstring php8.3-zip php8.3-curl php8.3-intl php8.3-imap php8.3-exif php8.3-bcmath php8.3-redis -y
Adjust the PHP memory_limit and make it to 512M:
nano /etc/php/8.3/fpm/php.ini
Find: memory_limit
memory_limit = 512M
2. Install and Configure Nginx
2.1 Nginx Installation
sudo apt install nginx -y
Once installed, start and enable Nginx:
sudo systemctl start nginx
sudo systemctl enable nginx
2.2 Create a Server Block for Mautic
Create a new file, for example, mautic.conf:
sudo nano /etc/nginx/sites-available/mautic.conf
Paste the following configuration (adjust domain and paths as needed):
server {
    listen 80;
    server_name marketing.example.com;
    root /var/www/mautic;  # This is where we'll place Mautic files

    index index.php index.html;

    # Log files
    access_log /var/log/nginx/mautic_access.log;
    error_log /var/log/nginx/mautic_error.log;

    location / {
        try_files $uri /index.php$is_args$args;
    }

    location ~ \.php$ {
        include snippets/fastcgi-php.conf;  # Or your distribution's PHP config
        fastcgi_pass unix:/run/php/php8.3-fpm.sock;  # Match your PHP-FPM socket or IP:port
    }

    # Deny access to hidden files
    location ~ /\.ht {
        deny all;
    }
}
Save and close the file.
Enable this configuration by creating a symlink:
sudo ln -s /etc/nginx/sites-available/mautic.conf /etc/nginx/sites-enabled/
Test the configuration and reload:
sudo nginx -t
sudo systemctl reload nginx
2.3 Configure firewall
We need to configure firewall to add HTTP and HTTPS ports
ufw allow 80/tcp
ufw allow 443/tcp
3. Obtain and Configure SSL Certificates
Having SSL on your website ensures data is transmitted securely. The easiest way to get a free SSL certificate is via Let’s Encrypt.
Install Certbot (the client for Let’s Encrypt):
sudo apt install certbot python3-certbot-nginx -y
Obtain and Install Certificate:
sudo certbot --nginx -d marketing.example.com
Follow the prompts.
Choose whether to redirect HTTP to HTTPS automatically.
Certbot Renewal: Certbot will set up a systemd timer or a cron job automatically to renew certificates. You can verify by running:
sudo certbot renew --dry-run
4. Create a Database for Mautic
Mautic uses MySQL or MariaDB to store its data. Install the database server if you haven’t already:
sudo apt install mariadb-server -y
Start and enable MariaDB/MySQL:
sudo systemctl start mariadb
sudo systemctl enable mariadb
(Optional) Secure your database server:
sudo mysql_secure_installation
Log into the database:
sudo mysql
Create a new database and user for Mautic:
CREATE DATABASE mautic_db CHARACTER SET utf8mb4 COLLATE utf8mb4_general_ci;
CREATE USER 'mautic_user'@'localhost' IDENTIFIED BY 'StrongPassword!';
GRANT ALL PRIVILEGES ON mautic_db.* TO 'mautic_user'@'localhost';
FLUSH PRIVILEGES;
EXIT;
Use a strong password and keep a note of these credentials because you’ll need them during Mautic’s web installation.
5. Install Node.js
Add the Node.js 20 repository:
curl -fsSL https://deb.nodesource.com/setup_20.x | sudo -E bash -
Install Node.js:
sudo apt install -y nodejs
6. Download and Place Mautic Files
Go to the Mautic Releases page to find the latest stable version. Copy the download link for the .zip file.
Download and unzip it to your web root:
cd /var/www
sudo wget https://github.com/mautic/mautic/releases/download/5.2.3/5.2.3.zip
sudo unzip 5.2.3.zip -d mautic
cd mautic
6.2 Using Composer
Ensure Composer is installed:
sudo apt install composer -y
composer install
6.3 : Adjus the file ownership
Adjust file ownership to allow Nginx/PHP-FPM to write to necessary directories:
sudo chown -R www-data:www-data /var/www/mautic
7. Run Mautic Web Installer
Now that Nginx, PHP, and Mautic files are set up, you can visit your domain in a web browser.
Go to https://marketing.example.com (or your domain).
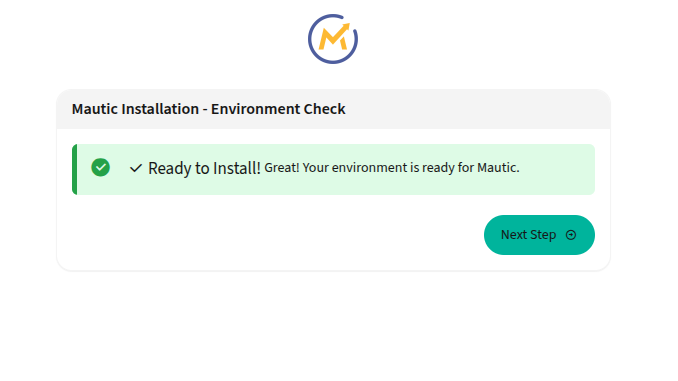
You’ll see the Mautic installation wizard.
Follow the prompts:
- Database Credentials: Enter the database name, user, and password you created.
- Administrator Account: Create a Mautic admin user (username, password, email).
Once installation completes, you’ll be redirected to the Mautic login screen. Log in using the admin account you set up.
8. Set Up Cron Jobs for Automated Tasks
Mautic relies on several scheduled tasks to run smoothly. Setting up Cron jobs ensures that emails, campaigns, tracking, and other automated workflows are processed on time.
Common Cron job commands include:
Segment Update: Updates your contact segments (lists).
php /var/www/mautic/bin/console mautic:segments:update
Campaign Update: Updates campaign contacts and triggers campaign events.
php /var/www/mautic/bin/console mautic:campaigns:update
Campaign Trigger: Sends emails and executes campaign actions.
php /var/www/mautic/bin/console mautic:campaigns:trigger
Email Queue (If using a queue):
php /var/www/mautic/bin/console mautic:emails:send
Fetch and Process Bounces (if you use IMAP for bounce handling):
php /var/www/mautic/bin/console mautic:email:fetch
8.1 Adding Cron Jobs
Edit your server’s cron file for the www-data user (Ubuntu/Debian) or whichever user runs PHP:
sudo crontab -u www-data -e
Add lines similar to the following (frequencies can be adjusted for your needs):
# Update Segments every 15 minutes
*/15 * * * * php /var/www/mautic/bin/console mautic:segments:update > /dev/null 2>&1

# Update Campaigns every 15 minutes
*/15 * * * * php /var/www/mautic/bin/console mautic:campaigns:update > /dev/null 2>&1

# Trigger Campaign Events every 15 minutes
*/15 * * * * php /var/www/mautic/bin/console mautic:campaigns:trigger > /dev/null 2>&1

# Send Emails in the Queue every 5 minutes
*/5 * * * * php /var/www/mautic/bin/console mautic:emails:send > /dev/null 2>&1

# Fetch and Process Bounces every 30 minutes
*/30 * * * * php /var/www/mautic/bin/console mautic:email:fetch > /dev/null 2>&1
Save and exit. Cron will pick up these commands automatically.
Conclusion and Best Practices
You now have a fully functioning Mautic installation running on Nginx with SSL, proper PHP configuration, and a MySQL/MariaDB database. Remember to:
- Keep Mautic Updated: Regularly update to the latest version to benefit from new features and security patches.
- Monitor Logs: Check Nginx, Mautic, and PHP error logs for any issues.
- Back Up Data: Periodically back up your database and Mautic files.
- Check Email Reputation: Use a reputable SMTP provider and monitor bounce rates.
- Stay Secure: Ensure your server firewall (e.g., UFW, firewalld) and other security measures are in place.
In this tutorial, we've learnt how to install Mautic on Ubuntu 24.04. With all these steps completed, you’re set to harness Mautic’s powerful marketing automation features—managing leads, sending targeted campaigns, and measuring engagement effectively. Good luck with your marketing automation journey!
