How to Install Umami Analytics on Ubuntu 24.04

In this tutorial, we'll learn how to install Umami analytics on Ubuntu 24.04.
What Is Umami?
Umami is a self-hosted, privacy-focused website analytics platform designed to give us clear insights without the complexity or tracking issues found in traditional analytics tools. It collects essential metrics such as page views, visitor sources, devices, and screen sizes while keeping data lightweight, fast, and fully in our control.
Umami does not use cookies, does not track personal information, and easily bypasses most ad-blockers when configured correctly. Because we host it on our own server, we get full ownership of our analytics data with no third-party dependence. It is a great choice for businesses, developers, and agencies that want simple and accurate analytics without sacrificing user privacy.
Prerequisites
Before we begin, ensure we have the following:
- An Ubuntu 24.04 on dedicated server or KVM VPS.
- Basic Linux Command Line Knowledge.
- A domain name pointing A record to server IP.
How to Install Umami Analytics on Ubuntu 24.04
1. Update Ubuntu 24.04
We update the server first so everything runs smoothly.
sudo apt update && sudo apt upgrade -y
2. Install Docker and Docker Compose
sudo apt install -y ca-certificates curl gnupg lsb-release
Add the Docker key and repository:
curl -fsSL https://download.docker.com/linux/ubuntu/gpg \
| sudo gpg --dearmor -o /usr/share/keyrings/docker-archive-keyring.gpg

echo \
"deb [arch=$(dpkg --print-architecture) \
signed-by=/usr/share/keyrings/docker-archive-keyring.gpg] \
https://download.docker.com/linux/ubuntu $(lsb_release -cs) stable" \
| sudo tee /etc/apt/sources.list.d/docker.list > /dev/null
Install Docker:
sudo apt update
sudo apt install -y docker-ce docker-ce-cli containerd.io docker-compose-plugin
sudo systemctl enable --now docker
Check versions:
docker --version
docker compose version
3. Create Umami Project Folder
mkdir ~/umami && cd ~/umami
This keeps everything organized.
4. Create Secrets for Database and Umami
export UMAMI_APP_SECRET=$(openssl rand -hex 32)
export POSTGRES_PASSWORD=$(openssl rand -hex 24)
Now create the .env file:
cat > .env <<EOF
UMAMI_DATABASE_URL=postgresql://umami:${POSTGRES_PASSWORD}@umami-db:5432/umami
UMAMI_APP_SECRET=${UMAMI_APP_SECRET}
UMAMI_PORT=3000
DOMAIN=analytics.example.com
EOF
Replace analytics.example.com with your domain.
5. Create Docker compose file
nano docker-compose.yml
Add following content:
services:
  umami-db:
    image: postgres:15
    restart: unless-stopped
    environment:
      POSTGRES_DB: umami
      POSTGRES_USER: umami
      POSTGRES_PASSWORD: ${POSTGRES_PASSWORD}
    volumes:
      - db_data:/var/lib/postgresql/data

  umami:
    image: ghcr.io/umami-software/umami:postgresql-latest
    restart: unless-stopped
    env_file: .env
    environment:
      DATABASE_URL: ${UMAMI_DATABASE_URL}
      DATABASE_TYPE: postgresql
      APP_SECRET: ${UMAMI_APP_SECRET}
      PORT: ${UMAMI_PORT}
    depends_on:
      - umami-db
    ports:
      - "127.0.0.1:3000:3000"

volumes:
  db_data:
Save and exit the file.
This creates two containers: PostgreSQL and Umami.
Start Umami
docker compose up -d
Check logs:
docker compose logs -f umami
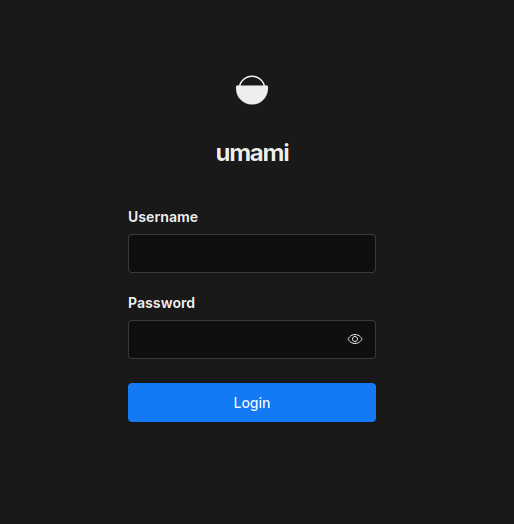
Create Admin User
The official a default login:
Username: admin
Password: umami
We can create it manually:
docker compose exec umami npx umami create-admin-user
Set your admin username and password here.
6. Install Nginx and Enable HTTPS
Install Nginx and Certbot:
sudo apt install -y nginx certbot python3-certbot-nginx
sudo systemctl enable --now nginx
Enable Firewall
sudo apt install -y ufw
sudo ufw allow OpenSSH
sudo ufw allow 'Nginx Full'
sudo ufw enable
Create a site file:
sudo nano /etc/nginx/sites-available/umami.conf
Paste:
server {
    listen 80;
    server_name analytics.example.com;

    location / {
        proxy_pass http://127.0.0.1:3000;
        proxy_set_header Host $host;
        proxy_set_header X-Forwarded-For $proxy_add_x_forwarded_for;
        proxy_set_header X-Forwarded-Proto $scheme;
    }

    location = /umami.js {
        proxy_pass http://127.0.0.1:3000/umami.js;
    }
}
Enable the config:
sudo ln -s /etc/nginx/sites-available/umami.conf /etc/nginx/sites-enabled/
sudo nginx -t
sudo systemctl reload nginx
Get SSL certificate:
sudo certbot --nginx -d analytics.example.com --agree-tos -m admin@example.com --non-interactive
7. Use the Tracking Script
Open Umami dashboard in browser:
https://analytics.example.com
Add this script to our website:
<script defer src="https://analytics.example.com/umami.js" data-website-id="YOUR-ID"></script>
Umami starts tracking instantly.
8. Backup Database
mkdir -p ~/umami/backups
docker compose exec umami-db \
pg_dump -U umami umami > ~/umami/backups/umami-$(date +%F-%H%M).sql
9. Upgrade Umami Later
docker compose pull
docker compose up -d
Conclusion
By installing Umami on Ubuntu 24.04, we create a fast, secure, and fully private analytics system that runs on our own infrastructure. The setup with Docker, PostgreSQL, and Nginx keeps everything stable and easy to manage, while HTTPS ensures our data stays protected.
Once configured, Umami gives us a clean dashboard, real-time tracking, and accurate statistics without relying on external services. This makes it a powerful solution for teams that value privacy, performance, and full control over their analytics data. With regular backups and occasional updates, our Umami setup will stay reliable and ready to support all of our websites.
