Install and Configure Uptime Kuma on Rocky Linux 10

Learn how to install and configure Uptime Kuma on Rocky Linux 10 to monitor your website uptime and server health.
Ensuring website uptime is not just good practice it’s essential. Downtime can lead to lost traffic, decreased trust, and even financial loss. That’s where Uptime Kuma, an easy-to-use, self-hosted, open-source monitoring tool, comes into play.
This guide walks through how we can set up Uptime Kuma on Rocky Linux, a stable and secure RHEL-based Linux distribution that’s widely used in production environments.
By the end of this tutorial, we’ll have a fully functional uptime monitoring dashboard hosted on our own server no third-party service needed.
What Is Uptime Kuma?
Uptime Kuma is a self-hosted monitoring tool inspired by Uptime Robot. It offers a beautiful web-based interface to track the availability of websites, servers, ports, and APIs. It supports notifications via Telegram, Discord, Slack, email (SMTP), and more. It’s ideal for developers, DevOps teams, and anyone running production websites.
Prerequisites
Before we begin, ensure the following:
- A Rocky Linux 10 installed dedicated server or KVM VPS.
- A domain name (optional but recommended for HTTPS setup)
- Basic knowledge of the terminal
How to Install and Set Up Uptime Kuma on Rocky Linux 10 for Self-Hosted Website Monitoring (Step-by-Step Guide)
Step 1: Update the System
We always start by ensuring our server is up-to-date. Run:
sudo dnf update -y && sudo dnf upgrade -y
Step 2: Install Node.js (Latest LTS)
Uptime Kuma runs on Node.js. Let’s install the latest LTS version:
curl -fsSL https://rpm.nodesource.com/setup_lts.x | sudo bash -
sudo dnf install -y nodejs
Verify the version:
node -v
npm -v
This should show something like v24.x.x for Node.js.
Step 3: Install Git
We’ll need Git to clone the Uptime Kuma repository:
sudo dnf install -y git
Step 4: Clone the Uptime Kuma Repository
Next, we clone the official repo to our server:
git clone https://github.com/louislam/uptime-kuma.git
cd uptime-kuma
Step 5: Install Dependencies
From the project directory, install all necessary packages:
npm run setup
This will take a few minutes. It installs the backend and frontend dependencies automatically.
Step 6: Install MariaDB on AlmaLinux 10
Install MariaDB server
sudo dnf install mariadb-server -y
Start and enable service
sudo systemctl enable --now mariadb
Secure MariaDB installation
sudo mysql_secure_installation
Log in to MariaDB
sudo mysql -u root -p
Create database
CREATE DATABASE uptimekuma;
Create user
CREATE USER 'kumauser'@'localhost' IDENTIFIED BY 'StrongPasswordHere';
Grant permissions
GRANT ALL PRIVILEGES ON uptimekuma.* TO 'kumauser'@'localhost';
Apply changes
FLUSH PRIVILEGES;
Exit MariaDB
EXIT;
Step 7: Start Uptime Kuma
Now let’s run Uptime Kuma to ensure everything works:
node server/server.js
Visit http://your-server-ip:3001 in a browser. We should see the Uptime Kuma setup screen.
To keep the app running permanently, we’ll set it up as a service.
Step 8: Create a Systemd Service
Create a systemd service file:
sudo nano /etc/systemd/system/uptime-kuma.service
Paste the following:
[Unit]
Description=Uptime Kuma Monitoring Service
After=network.target

[Service]
Type=simple
WorkingDirectory=/root/uptime-kuma
ExecStart=/usr/bin/node server/server.js
Restart=always
Environment=NODE_ENV=production

[Install]
WantedBy=multi-user.target
Note: Replace WorkingDirectory=/root/uptime-kuma with you uptime-kuma directory path.
Save and exit, then run:
sudo systemctl daemon-reexec
sudo systemctl enable --now uptime-kuma
Check the status:
sudo systemctl status uptime-kuma
Step 9: Configure Firewall and SELinux
Allow traffic to port 80 and 443:
sudo firewall-cmd --permanent --add-port={80,443}/tcp
sudo firewall-cmd --reload
Allow Nginx to connect to any port (less secure but effective for dev/test)
sudo setsebool -P httpd_can_network_connect 1
Step 10: Set Up a Reverse Proxy with Nginx
To access Uptime Kuma with a domain (e.g., monitor.example.com), let’s configure Nginx:
sudo dnf install -y nginx
sudo systemctl enable --now nginx
Then create a config file:
sudo nano /etc/nginx/conf.d/uptime-kuma.conf
Paste:
server {
    listen 80;
    server_name monitor.example.com;

    location / {
        proxy_pass http://localhost:3001/;
        proxy_http_version 1.1;
        proxy_set_header Upgrade $http_upgrade;
        proxy_set_header Connection 'upgrade';
        proxy_set_header Host $host;
        proxy_cache_bypass $http_upgrade;
    }
}
Reload Nginx:
sudo nginx -t
sudo systemctl reload nginx
Step 11: Secure with HTTPS (Recommended)
Install Certbot:
sudo dnf install -y epel-release
sudo dnf install -y certbot python3-certbot-nginx
Then run:
sudo certbot --nginx -d monitor.example.com
Certbot will auto-renew the certificate every 90 days.
Step 12: Setup Monitoring via Web Interface
Now open your browser and go to the Uptime Kuma URL.
https://monitor.example.com/setup-database

Enter database detail that we have created earlier.
Next step:
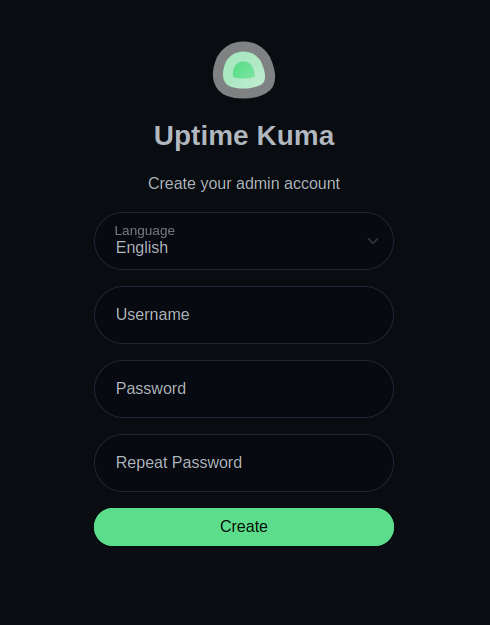
- Create an admin account
- Add monitors (HTTP, TCP, Ping, etc.)
- Set notification channels (e.g., Telegram, Discord, Email)
- Explore dark mode, public status page, and backup settings
Final Thoughts
We have seen how to install and configure Uptime Kuma on Rocky Linux 10. With Uptime Kuma on Rocky Linux, we have complete control over our uptime monitoring. It’s lightweight, customizable, and incredibly powerful. Whether we’re running client websites, internal dashboards, or production APIs knowing they’re up and running is crucial.
Uptime Kuma + Rocky Linux delivers a secure, open-source, no-subscription alternative to paid uptime services on our terms.
