Install Virtualizor on AlmaLinux 8

In this tutorial, we'll explain how to install Virtualizor on AlmaLinux 8.
Virtualizor is a powerful web-based VPS control panel that allows administrators to easily create, manage, and monitor virtual private servers (VPS). It supports various virtualization technologies such as KVM, Xen, and OpenVZ. In this tutorial, we'll walk through the process of installing Virtualizor on AlmaLinux, a popular CentOS alternative that offers a stable and secure environment for hosting. For this demostration purpose, we are using KVM as a kernel type.
Prerequisites
Before you begin, ensure you have the following:
- AlmaLinux dedicated server: A fresh installation of AlmaLinux with root access.
- Static IP Address: The server should have a static IP address configured.
- Minimum Requirements: 4 GB RAM and 100 GB disk space (for optimal performance, 8 GB RAM or more is recommended).
Install Virtualizor on AlmaLinux
Step 1: Update the Server
Start by updating your AlmaLinux system to ensure all packages are up-to-date. Run the following commands:
sudo dnf update -y
sudo dnf upgrade -y
Step 2: Set Hostname and Disable SELinux
Set the hostname of your server to avoid any configuration issues:
sudo hostnamectl set-hostname yourhostname.example.com
Disable SELinux by editing the /etc/selinux/config file:
sudo nano /etc/selinux/config
Change SELINUX=enforcing to SELINUX=disabled. Save and exit the file, then reboot the server:
sudo reboot
Step 3: Install Required Dependencies
Install the necessary dependencies for Virtualizor using the following command:
sudo dnf install wget curl -y
Step 4: Download and Install Virtualizor
Download the Virtualizor installation script:
wget -N https://files.virtualizor.com/install.sh
Make the script executable:
chmod 755 install.sh
Run the installation script. If you are using KVM as your virtualization technology, use the following command:
sudo ./install.sh email=[Your Email ID] kernel=kvm
You can replace kvm with xen or openvz depending on your virtualization needs. The installation process will take some time, as it downloads and configures all the required components.
Step 5: Configure Virtual Network Bridge
By default, eth0 will be assumed as the Network Interface. To tell the Virtualizor to use anything other than Network Interface, You need to set it here.
You can change these settings any time from the Virtualizor Admin Panel -> Configuration -> Slave Settings. The following is a screenshot of the available settings :
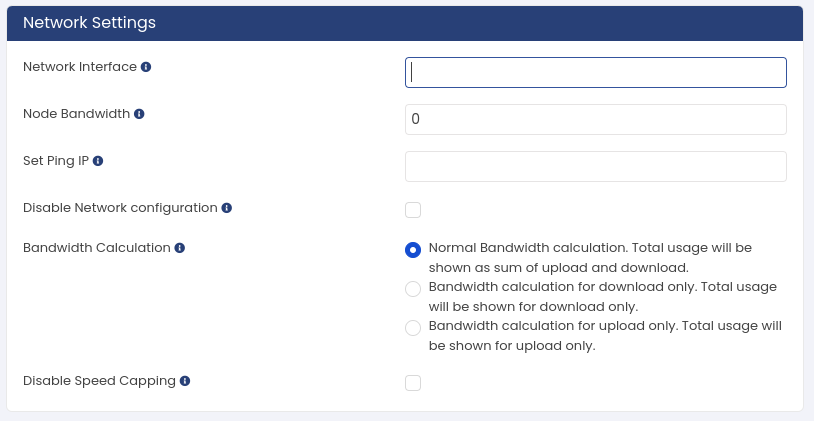
Once you change the Network Interface, click Save Configuration button at bottom of the page.
Virtualizor will create a viifbr0 bridge automatically.
viifbr0 detects the IP, Netmask, and GATEWAY from :
/etc/sysconfig/network-scripts/ifcfg-INTERFACE_NAME
Next, navigate to your terminal and restart virtnetwork. This is the important step.
service virtnetwork restart
Step 7: Configure Firewall
Virtualizor uses ports from 4081 - 4085. If there is any firewall restricting this, you will need to allow these ports.
firewall-cmd --zone=public --permanent --add-port=4081-4085/tcp
firewall-cmd --zone=public --permanent --add-port=5900-6000/tcp
firewall-cmd --reload
Step 6: Access Virtualizor Admin Panel
Once the installation is complete, you can access the Virtualizor admin panel by navigating to:
http://your-server-ip:4084
Login with the default credentials:
Username: root
Password: Your server's root password
Step 7: Complete the Initial Setup
1. Create IP Pool
First, create IP Pool. Navigate to IP Pool -> Create IP Pool. You will receive a form where you can fill the IP configuration like name, gateway, Netmask, Nameservers, First IP and Last IP.
2. Create Plan
Next, Let's create a plan. Navigate to Plans -> Add Plan. Here you will get a Add Plan form. Enter the plan name, and Plan Type will be KVM because during the installation, we have selected kvm as a kernel type. Fill the other values according your requirements. Remember, in CPU Units fill 2 and CPU Cores 2. If you add 1, it will give an error during the VPS deployment.
3. Create User
Next, create a user. Naviagate to Users -> Add User. Here you can create a new user.
4. Add OS
Finally, navigate to Media -> Template Browser and select the OS that you want to install in Virtualizor for VPS. Once you required OS, at the bottom click Save Settings button. It will start downloading the OS and adding in the virtualizor. It may take time as per the amount of OS you have selected.
That's it. It is the very basic configuration that requires to deploy the VPS.
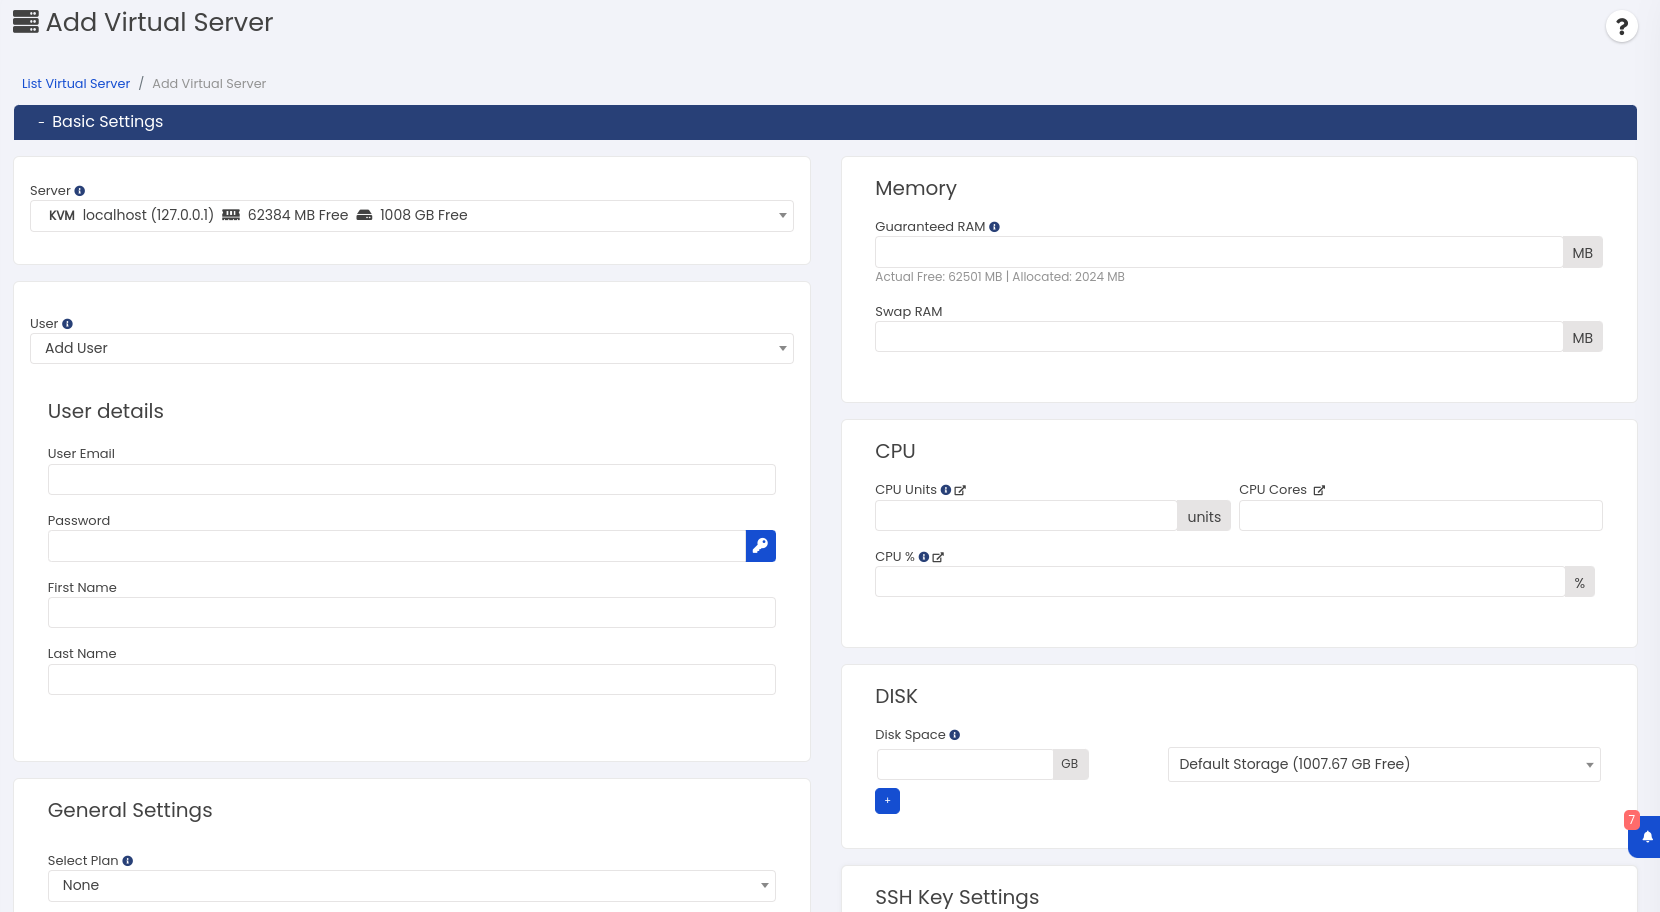
Step 8: Create Your First Virtual Machine
After completing the initial setup, you can start creating virtual machines by navigating to Virtual Server -> clicking on "Create VPS" in the Virtualizor panel.
Conclusion
Congratulations! You have successfully installed Virtualizor on AlmaLinux. We have seen how to install Virtualizor on AlmaLinux 8. You can now manage your virtual machines with ease through the Virtualizor control panel. For further customization and management, refer to the Virtualizor official documentation.
If you encounter any issues during installation, feel free to ask for help or consult the Virtualizor support forums.
