How To Install CloudPanel on Ubuntu 24.04

In this tutorial, learn how install CloudPanel on Ubuntu 24.04.
Below you’ll find a comprehensive, step-by-step guide on installing and configuring CloudPanel on an Ubuntu 24.04 server. CloudPanel is a modern server control panel designed for speed, simplicity, and ease of use—making it a great choice if you’re looking for high-performance hosting.
1. Understanding What CloudPanel Is
Before diving into the installation, let’s clarify what CloudPanel does and why you might choose it:
- Server Management Interface: CloudPanel provides a graphical web interface to manage your server, domains, and applications.
- Performance Focus: It’s built to be lightweight, using minimal system resources, so the server’s power can be dedicated to your websites or applications.
- Security Features: CloudPanel includes features like firewall configuration and SSL management out of the box.
With these points in mind, you’re ready to set up CloudPanel on Ubuntu 24.04.
2. Prerequisites and Initial Server Setup
- A Ubuntu 24.04 installed dedicated server or KVM VPS.
- A root user or normal user with administrative privileges.
- A domain name point A record to server's IP
2.2. Update and Upgrade Your Server
It’s always a good practice to have the most recent updates installed before starting a new software installation. Log in to your server via SSH as the root user (or a user with sudo privileges) and run:
sudo apt update && sudo apt upgrade -y
Explanation: apt update refreshes the list of available packages, and apt upgrade upgrades any outdated packages to their latest versions.
Why Do This?: Running this ensures your system is patched and secure, and it prevents any compatibility issues during the CloudPanel installation.
How To Install CloudPanel on Ubuntu 24.04
3. Installing CloudPanel
CloudPanel provides an installation script that simplifies the entire setup process. Here’s how to do it step by step:
3.1. Download the Installation Script
From your Ubuntu server’s terminal, run the following command:
curl -sSL https://installer.cloudpanel.io/ce/v2/install.sh -o cloudpanel-install.sh
- Explanation: This uses curl to silently (-sS) download (-L follows redirects) the CloudPanel Community Edition install script from the official CloudPanel source.
- Why Save the Script?: Saving the file locally (-o) allows you to inspect it before running for security reasons.
3.2. Make the Script Executable
Next, make the script executable:
chmod +x cloudpanel-install.sh
Explanation: chmod +x grants the script permission to run as an executable.
3.3. Run the Script
Finally, execute the install script:
sudo ./cloudpanel-install.sh
What Happens Next:
- The script will prompt you for confirmation at various points.
- It will automatically install and configure required dependencies (like NGINX, PHP-FPM, and MySQL/MariaDB).
- Once completed, it will provide you with a URL to access the CloudPanel interface.
+ printf '~~~~~~~~~~~~~~~~~~~~~~~~~~~~~~~~~~~~~~~~~~~~~~~~~~~~~~~~~~~~\n'
~~~~~~~~~~~~~~~~~~~~~~~~~~~~~~~~~~~~~~~~~~~~~~~~~~~~~~~~~~~~
+ printf 'The installation of CloudPanel is complete!\n\n'
The installation of CloudPanel is complete!

+ printf 'CloudPanel can be accessed now: https://65.20.72.182:8443 \n'
CloudPanel can be accessed now: https://65.20.72.182:8443
+ printf '~~~~~~~~~~~~~~~~~~~~~~~~~~~~~~~~~~~~~~~~~~~~~~~~~~~~~~~~~~~~\n'
~~~~~~~~~~~~~~~~~~~~~~~~~~~~~~~~~~~~~~~~~~~~~~~~~~~~~~~~~~~~
Note: Depending on your server’s speed and internet connection, the installation can take anywhere from 5 to 15 minutes. Let the process complete without interruption.
4. Accessing CloudPanel for the First Time
4.1. Find the CloudPanel URL
After the installation finishes, the script typically displays a message with the address (URL) to access CloudPanel. By default, it might look something like:
https://YOUR_SERVER_IP:8443
4.2. Log In to the Dashboard
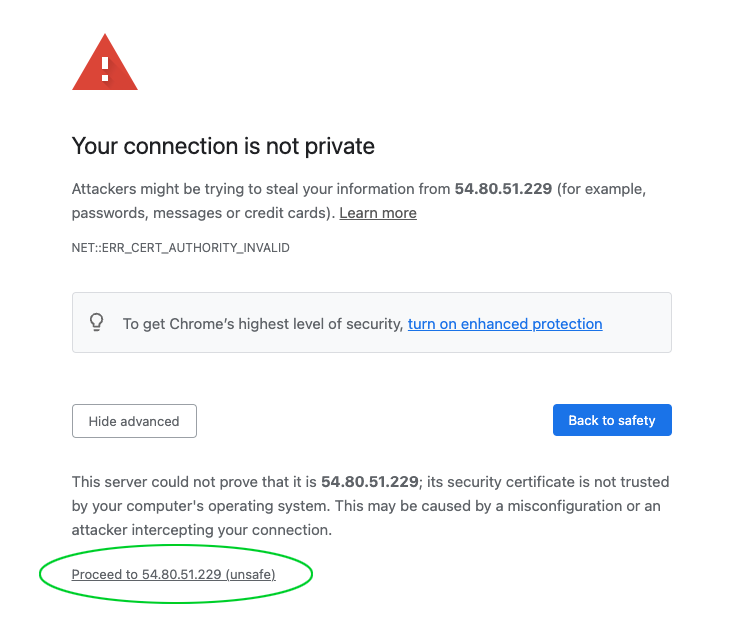
Open your web browser. Navigate to the URL provided (e.g., https://YOUR_SERVER_IP:8443).
You might see a warning about the self-signed SSL certificate. This is normal for a new server, so you can bypass it temporarily or install a trusted SSL certificate later.
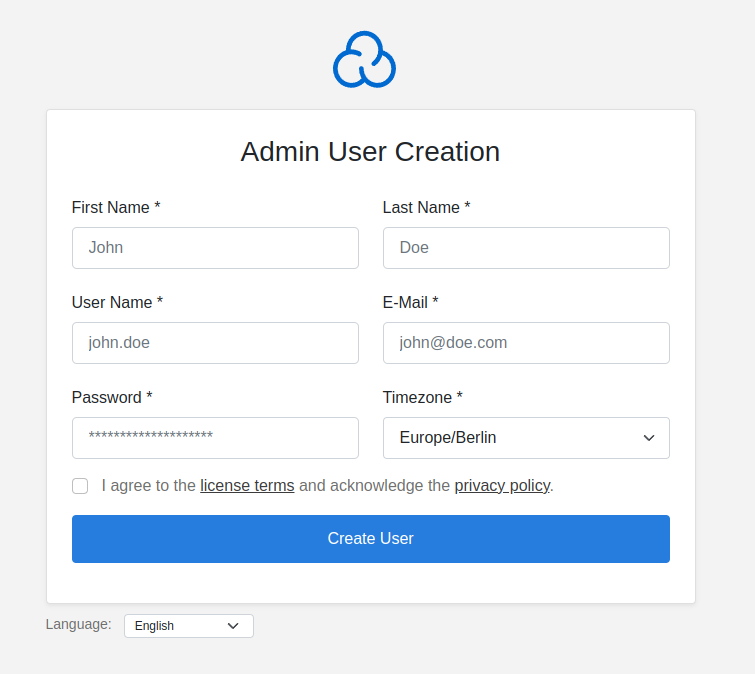
Set up your initial administrator account. This includes choosing a username, password, and providing an email address.
5. Basic CloudPanel Configuration
Once you’re inside the CloudPanel interface, you’ll want to perform a few initial configuration steps:
5.1. Updating the Root Domain or Hostname
In the Settings section (or System Settings):
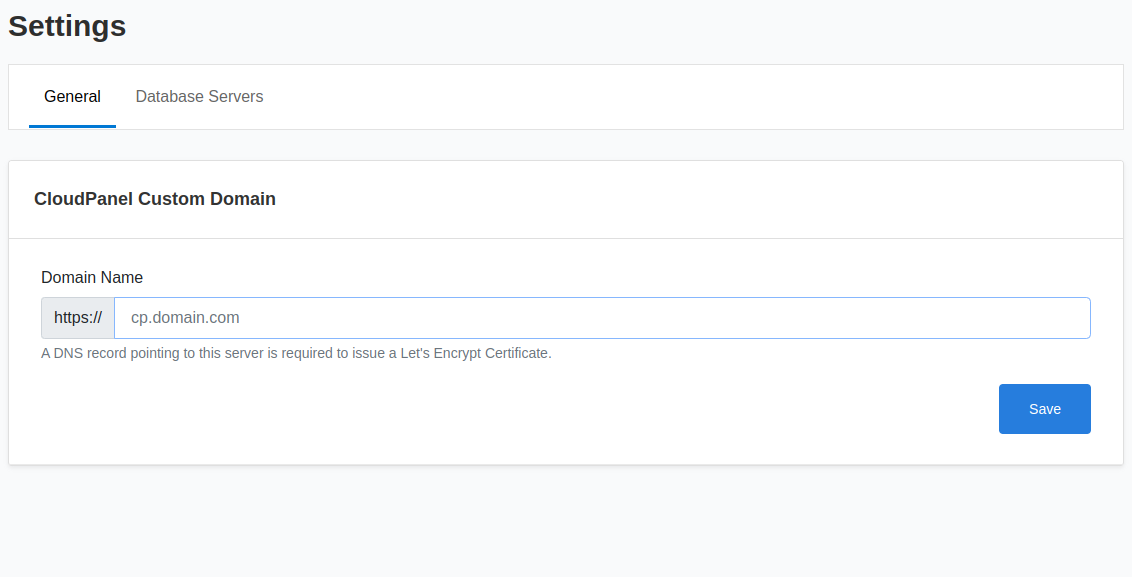
Hostname: If your server doesn’t have a fully qualified domain name (FQDN), configure it here.
Explanation: A proper hostname or domain name helps with SSL certificates, email sending, and general server identification.
5.2. Creating a New User (Optional)
CloudPanel allows you to manage multiple users if you’d like to delegate administration:
Go to Users in the CloudPanel sidebar.
Click Create New User.
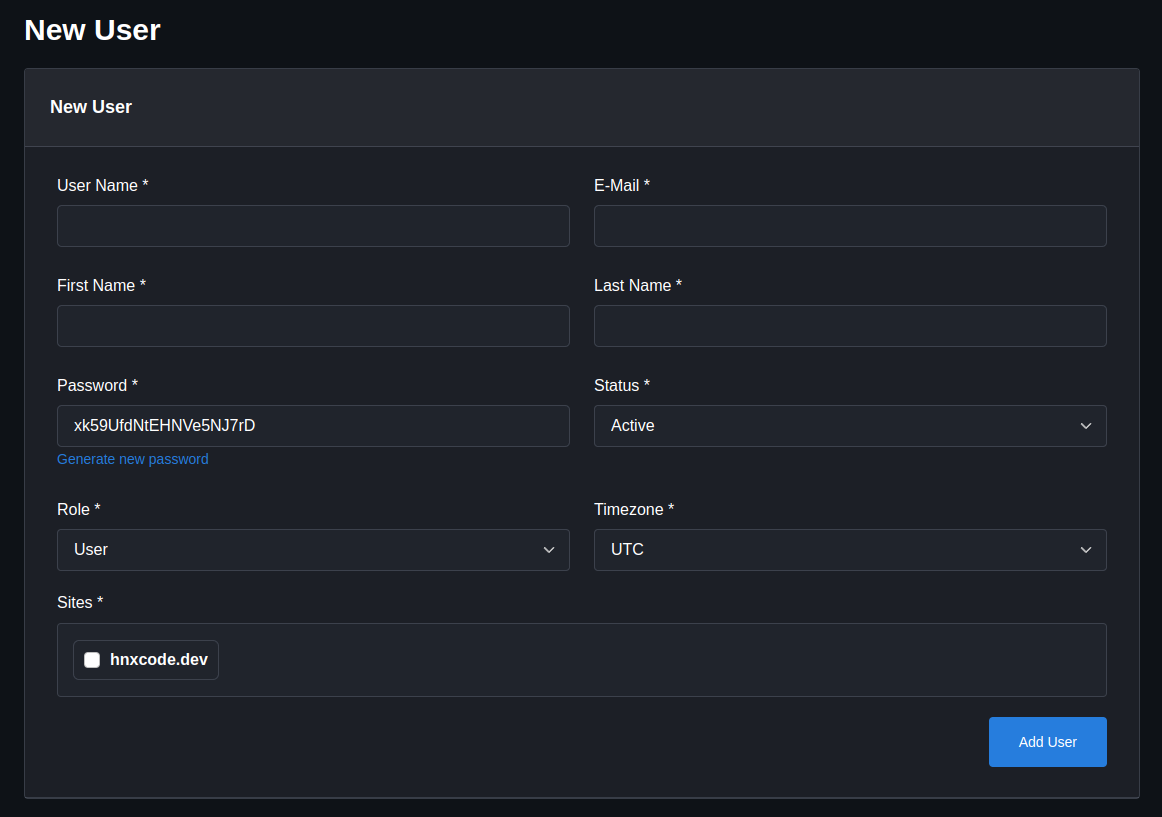
Provide username, password, and appropriate permissions.
5.3. Firewall Settings
Within Security or Firewall settings in CloudPanel:
Ensure essential ports (e.g., HTTP: 80, HTTPS: 443) are open.
Close ports you don’t need to reduce the risk of unauthorized access.
6. Adding a Domain and Deploying a Website
One of the primary reasons to use CloudPanel is to host websites or web applications. Here’s how:
6.1. Point Your Domain to the Server
In your domain registrar’s DNS settings, create an A record pointing your domain (e.g., example.com) to the public IP address of your Ubuntu server.
Wait for the DNS to propagate. This can take anywhere from a few minutes to 48 hours, depending on your DNS provider.
6.2. Create a Web Application in CloudPanel
- Log in to the CloudPanel interface.
- Navigate to Domains or Applications (depending on the version).
- Click Create New Application (or Add Domain).
- Enter your domain name (e.g., example.com).
- Select the PHP version you want to use (CloudPanel often supports multiple versions, like 8.1, 8.2, etc.).
- Choose additional settings (like enabling SSL at this stage, if you already have an SSL certificate or want a free Let’s Encrypt certificate).
6.3. Test Your Website
Once you’ve added the domain:
- Open your domain (e.g.,
https://example.com) in a browser. - You should see either a default “Hello World” or “It works!” page from CloudPanel’s default application.
- If everything looks good, you can upload your website files to the directory associated with that domain (usually found in /home/cloudpanel/htdocs/example.com/).
7. Managing SSL Certificates
7.1. Using Let’s Encrypt
CloudPanel makes it easy to issue Let’s Encrypt SSL certificates for free:
Go to Domains or Applications in the CloudPanel menu.
Select the domain you added.
Look for the SSL/HTTPS section and click Issue Certificate or Enable SSL.
CloudPanel will request and install the certificate automatically.
8. Performance Tuning Tips
Although CloudPanel is optimized out of the box, here are some additional suggestions to squeeze more performance out of your server:
8.1. PHP Settings
PHP-FPM is installed by default. You can adjust settings like memory_limit or max_execution_time in the CloudPanel interface or in the /etc/php/8.x/fpm/php.ini file (replace 8.x with the version you’re using).
8.2. Caching and Compression
NGINX Configuration: CloudPanel uses NGINX by default. For additional performance, enable caching headers and gzip compression. You can do this under the domain’s Advanced Settings in CloudPanel or by editing its site-specific NGINX config.
8.3. Database Optimization
MySQL/MariaDB: Tweak the my.cnf file based on your server’s resources. Keep an eye on parameters like innodb_buffer_pool_size (which should typically be around 50-70% of your total RAM for dedicated database servers).
8.4. Use a Content Delivery Network (CDN)
While not strictly part of CloudPanel, integrating a CDN (like Cloudflare) can drastically improve global content delivery speed. Just update your DNS settings to point through the CDN and set up caching rules.
9. Security Considerations
9.1. Keep CloudPanel Updated
CloudPanel releases updates to fix bugs and security issues. In the admin interface, you’ll often see an Update button or get notifications about new versions. Apply updates as soon as it’s safe to do so.
9.2. Configure a Firewall
If you didn’t configure it earlier, revisit the Firewall section in CloudPanel.
Only allow inbound traffic on ports 80 (HTTP), 443 (HTTPS), and 8443 (CloudPanel) if required.
For SSH, consider changing the default port from 22 to a non-standard port.
9.3. Regular Backups
Use CloudPanel’s built-in backup features if available, or configure your own backup system (e.g., using tools like rsnapshot or restic).
Store backups off-site for extra safety.
10. Ongoing Maintenance and Best Practices
Monitor Resource Usage: Keep track of CPU, RAM, and disk usage from the CloudPanel dashboard or use monitoring tools like Netdata or Grafana.
Log Analysis: Check your NGINX, PHP-FPM, and MySQL logs periodically for any errors or unusual activity.
Enable Automatic Security Updates: Ubuntu can auto-install security patches. Configure this in /etc/apt/apt.conf.d/50unattended-upgrades.
11. Wrapping Up
Congratulations! In this tutorial, we've learnt how install CloudPanel on Ubuntu 24.04. Here’s a quick recap of what you achieved:
Installation: You ran CloudPanel’s official script, which installed all necessary components (NGINX, PHP-FPM, MySQL/MariaDB).
Configuration: You set your hostname, managed firewall rules, and created a domain with SSL.
Optimization: You learned how to tweak PHP, NGINX, and the database for better performance.
Security: You enabled SSL certificates, configured SSH access, and planned for regular backups.
With CloudPanel, you now have a powerful yet user-friendly control panel. This should streamline your workflow for adding websites, securing them with SSL, and keeping your server optimized.
Enjoy your new high-performance hosting environment! If you ever run into issues, consult the CloudPanel documentation or reach out to their community forums for support.
