Install and Configure Outline on Ubuntu 24.04

In this tutorial, we'll learn how to install and configure Outline on Ubuntu 24.04 server.
What is Outline?
Outline is a modern, open-source collaborative knowledge base designed for teams. It provides a fast, intuitive, and feature-rich platform to centralize and organize all of our team's information, documentation, and institutional knowledge.
Think of it as team's shared brain or a private wiki. It offers a user-friendly editor with markdown support, real-time collaboration features (like comments and threads), powerful search capabilities, and integrations with popular tools like Slack. Outline focuses on speed and ease of use, making it simple for teams to create, share, and find the information they need to work efficiently.
Establishing a robust collaborative knowledge base is essential for any team looking to centralize information, streamline workflows, and foster efficient communication. Outline stands out as an excellent open-source solution, offering a user-friendly interface with powerful features. This guide will walk us through the step-by-step process of installing and configuring Outline on Ubuntu 24.04, ensuring a smooth setup for team's knowledge sharing needs.
System Requirements and Preparation
Before we begin the installation, let's ensure Ubuntu 24.04 server meets the necessary prerequisites. Outline is designed to be lightweight, but for a production environment, we recommend:
- A Ubuntu 24.04 installed dedicated server or KVM VPS.
- A non-root user with sudo privileges.
- A domain name pointed to server's IP address (e.g., docs.example.com).
How to Install and Configure Outline on Ubuntu 24.04
It's always a good practice to update system packages before installing new software:
sudo apt update && sudo apt upgrade -y
1. Install Docker and Docker Compose
Outline is typically deployed using Docker, which simplifies the installation and management of its various components (application, database, and Redis).
First, let's install Docker:
sudo apt-get install ca-certificates curl
sudo install -m 0755 -d /etc/apt/keyrings
sudo curl -fsSL https://download.docker.com/linux/ubuntu/gpg -o /etc/apt/keyrings/docker.asc
sudo chmod a+r /etc/apt/keyrings/docker.asc
Add the repository to Apt sources:
echo \
  "deb [arch=$(dpkg --print-architecture) signed-by=/etc/apt/keyrings/docker.asc] https://download.docker.com/linux/ubuntu \
  $(. /etc/os-release && echo "${UBUNTU_CODENAME:-$VERSION_CODENAME}") stable" | \
  sudo tee /etc/apt/sources.list.d/docker.list > /dev/null
sudo apt-get update
To install the latest version, run:
sudo apt install docker-ce docker-ce-cli containerd.io docker-buildx-plugin docker-compose-plugin -y
2. Set Up the Outline Environment
We'll store Outline's configuration in a dedicated directory. Let's create it:
mkdir ~/outline && cd ~/outline
Before we create .env file generate truly random string. We need 2 random string
openssl rand -hex 32
Generate 2 strings and store it somewhere. We need these string in .env file.
Outline uses a .env file for configuration. We need to create this file and populate it with essential variables. We'll start with a basic setup and expand on it.
nano .env
Here's a basic .env configuration. We'll replace placeholder values with our actual details:
# Core Outline Settings
SECRET_KEY=1a4faf0a76bf90c75371111b4a7b944d321b415c39c38755e3e5548735968a85
URL=https://docs.example.com
PORT=3000
UTILS_SECRET=WYsordejgo9MV5WSZASPOsJrv4ffwl2SEUs86q8uupvFc2c5eg3Ii7MwdldFFibE

# Database Configuration (PostgreSQL)
DATABASE_URL=postgres://outline:password@postgres:5432/outline
PGSSLMODE=disable

# Redis Configuration
REDIS_URL=redis://redis:6379

FORCE_HTTPS=true
Note: Replace SECRET_KEY and UTILS_SECRET with the 2 random string you have created. Replace https://docs.example.com with your domain name.
3. Create Docker Compose File
Now, let's create docker-compose.yml file, which defines the services Outline needs:
nano docker-compose.yml
Add following content:
services:
  outline:
    image: outlinewiki/outline:latest
    depends_on:
      - postgres
      - redis
    env_file:
      - .env
    ports:
      - "3000:3000"
    restart: always

  postgres:
    image: postgres:15-alpine
    environment:
      POSTGRES_USER: outline
      POSTGRES_PASSWORD: password # Change this to a strong password
      POSTGRES_DB: outline
    volumes:
      - postgres_data:/var/lib/postgresql/data
    restart: always

  redis:
    image: redis:7-alpine
    volumes:
      - redis_data:/data
    restart: always

volumes:
  postgres_data:
  redis_data:
4. Initial Outline Setup
With our docker-compose.yml and .env files ready, we can now start Outline:
docker compose up -d
This command will download the necessary Docker images and start the services in detached mode. It might take a few minutes for the first run.
We can check the status of our containers:
docker compose ps
We should see outline, postgres, and redis running.
Troubleshooting
In case you cannot able to access Outline, execute following command to check the logs:
docker compose logs outline
It should look like for successful startup:
outline-1  | {"label":"lifecycle","level":"info","message":"Starting collaboration service"}
outline-1  | {"label":"lifecycle","level":"info","message":"Starting websockets service"}
outline-1  | {"label":"lifecycle","level":"info","message":"Starting worker service"}
outline-1  | {"label":"lifecycle","level":"info","message":"Starting web service"}
outline-1  | {"label":"lifecycle","level":"info","message":"Listening on http://localhost:3000 / https://docs.hnxcode.dev"}
5. Configure Nginx as a Reverse Proxy with SSL
Directly exposing Outline on port 3000 is not ideal for production. We'll use Nginx as a reverse proxy to handle incoming requests, manage SSL certificates (using Certbot for Let's Encrypt), and forward traffic to our Outline Docker container.
5.1 Install Nginx and Certbot
sudo apt install nginx certbot python3-certbot-nginx -y
5.2 Configure Firewall
We need to open HTTP and HTTPS ports in the firewall.
sudo ufw allow 'Nginx Full'
5.3 Configure Nginx
Let's create an Nginx configuration file for Outline:
sudo nano /etc/nginx/sites-available/outline
Paste the following content, replacing docs.example.com with our actual domain:
server {
    listen 80;
    server_name docs.example.com;

    location / {
        proxy_pass http://localhost:3000;
        proxy_set_header Upgrade $http_upgrade;
        proxy_set_header Connection "Upgrade";
        proxy_set_header Host $host;
        proxy_set_header X-Real-IP $remote_addr;
        proxy_set_header X-Forwarded-For $proxy_add_x_forwarded_for;
        proxy_set_header X-Forwarded-Proto $scheme;
    }
}
Enable the Nginx configuration by creating a symlink:
sudo ln -s /etc/nginx/sites-available/outline /etc/nginx/sites-enabled/
Test the Nginx configuration for syntax errors:
sudo nginx -t
If it shows "syntax is ok" and "test is successful," restart Nginx:
sudo systemctl restart nginx
6.4 Secure Nginx with Let's Encrypt SSL
Now, let's secure our Outline instance with an SSL certificate using Certbot and Let's Encrypt. This will enable HTTPS.
sudo certbot --nginx -d docs.example.com
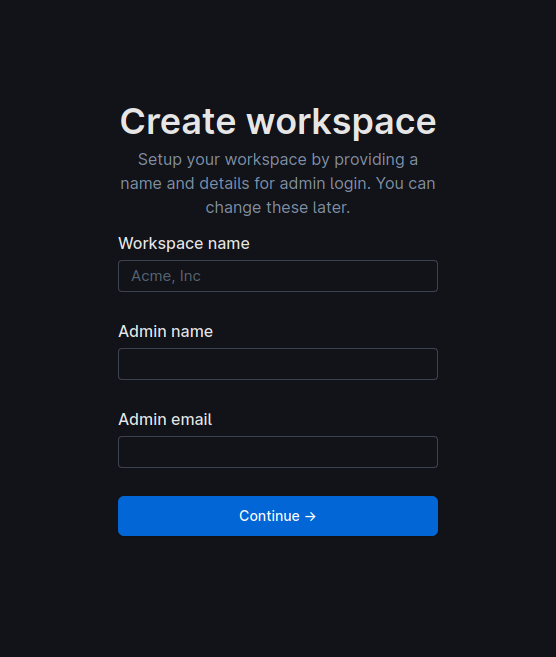
Now, if we visit https://docs.example.com in our web browser, we should see the Outline login page.
By following this comprehensive guide, we've successfully seen how to install and configure Outline on Ubuntu 24.04, creating a powerful and collaborative knowledge base for our team. This setup provides a solid foundation for organizing our collective knowledge efficiently and securely.
