Install Wiki.js on AlmaLinux 10 with Node.js

Learn how to install and configure Wiki.js on AlmaLinux 10 using Node.js, PostgreSQL, and Nginx. Step-by-step guide for setting up a modern self-hosted wiki.
What is Wiki.js
Wiki.js is a modern, open-source wiki platform built on Node.js. It offers a fast, lightweight, and beautifully designed interface for creating and managing documentation or knowledge bases. With built-in support for Markdown editing, version control, authentication systems, and integrations, Wiki.js is ideal for teams and individuals who want a powerful, self-hosted alternative to traditional wiki software.
When we want a collaborative, feature-rich documentation platform that’s open-source and modern, Wiki.js stands out. It’s built with Node.js, runs fast, has a beautiful interface, and is perfect for businesses, tech teams, and communities. In this tutorial, we’ll set up Wiki.js on an AlmaLinux 10 server, using Node.js and PostgreSQL for maximum performance and reliability.
Prerequisites
Before we begin, let’s ensure our environment meets the following requirements:
- A AlmaLinux 10 installed dedicated server or KVM VPS.
- A non-root user with sudo privileges.
- Basic knowledge of using the terminal.
- A domain name pointing to server IP.
How to Set Up a Lightweight Wiki with Wiki.js on AlmaLinux with Node.js and PostgreSQL
Step 1: Update AlmaLinux and Install Essentials
Let’s begin by ensuring our system is up-to-date and ready for deployment.
sudo dnf update -y
sudo dnf install -y epel-release nano git curl wget
Updating the OS and installing tools like git and curl helps us avoid compatibility issues later.
Step 2: Install Node.js (LTS Version)
Wiki.js relies on Node.js. We should use the latest LTS (Long-Term Support) version for stability.
# Enable NodeSource repo for Node.js 22.x (LTS as of 2025)
curl -fsSL https://rpm.nodesource.com/setup_lts.x | sudo bash -
sudo dnf install -y nodejs
Verify the installation:
node -v
npm -v
Step 3: Install and Configure PostgreSQL
Wiki.js supports several databases, but PostgreSQL is recommended for production. Let’s install it:
sudo dnf install -y postgresql-server postgresql-contrib
Initialize and start PostgreSQL:
sudo postgresql-setup --initdb
sudo systemctl enable --now postgresql
Secure PostgreSQL by setting a password for the default postgres user:
sudo -u postgres psql
# In the psql prompt, run:
\password postgres
# Enter a strong password, then exit:
\q
Now, let’s create a database and user for Wiki.js:
sudo -u postgres psql
# In the psql prompt, run:
CREATE DATABASE wikijs;
CREATE USER wikijsuser WITH PASSWORD 'StrongPasswordHere';
GRANT ALL PRIVILEGES ON DATABASE wikijs TO wikijsuser;
GRANT USAGE ON SCHEMA public TO wikijsuser;
GRANT CREATE ON SCHEMA public TO wikijsuser;
ALTER DEFAULT PRIVILEGES IN SCHEMA public GRANT ALL ON TABLES TO wikijsuser;

// If you want to be thorough and ensure future tables and sequences are also covered:
ALTER DEFAULT PRIVILEGES IN SCHEMA public GRANT ALL ON SEQUENCES TO wikijsuser;

// You can also grant all privileges just to be sure:
GRANT ALL ON SCHEMA public TO wikijsuser;
\q
Replace 'StrongPasswordHere' with a secure password.
Change PostgreSQL Authentication Method from ident to md5
Open the PostgreSQL host-based authentication config file:
sudo nano /var/lib/pgsql/data/pg_hba.conf
Look for a line like this:
# TYPE DATABASE    USER      ADDRESS         METHOD
local  all       all                   ident

Change it to:

local  all       all                   md5

Also ensure this is present for TCP connections:

host  all       all       127.0.0.1/32      md5
host  all       all       ::1/128         md5
local   replication     all               md5
Save and exit the file, then restart PostgreSQL to apply the changes:
sudo systemctl restart postgresql
Step 4: Secure with a Reverse Proxy
For a production setup, we often use Nginx or Apache as a reverse proxy to handle SSL and domain routing.
Install Nginx:
sudo dnf install -y nginx
sudo systemctl enable --now nginx
Allow HTTP and HTTPS ports in firewall:
sudo firewall-cmd --permanent --add-service=http
sudo firewall-cmd --permanent --add-service=https
sudo firewall-cmd --reload
By default, SELinux blocks Nginx from acting as a proxy. We must allow it explicitly:
sudo setsebool -P httpd_can_network_connect 1
Step 5: Download Wiki.js
Let’s download the latest Wiki.js release into /usr/share/nginx/wikijs.
mkdir /usr/share/nginx/wikijs && cd /usr/share/nginx/wikijs
Download the latest stable build (as of 2025):
wget https://github.com/requarks/wiki/releases/download/v2.5.307/wiki-js.tar.gz
Extract the file:
tar -xzf wiki-*.tar.gz
rm wiki-*.tar.gz
Step 6: Configure Wiki.js for PostgreSQL
Copy the sample config:
sudo cp config.sample.yml config.yml
sudo nano config.yml
Edit the database section to use PostgreSQL:
db:
  type: postgres
  host: localhost
  port: 5432
  user: wikijsuser
  pass: StrongPasswordHere
  db: wikijs
Update the user, pass, and db fields as per the details set above.
Step 7: Run Wiki.js
Let’s start Wiki.js for the first time to verify everything is working:
sudo node server
Check if there is any error. If not, check Ctrl+C to stop the server.
Step 8: Set Up Wiki.js as a System Service
To keep Wiki.js running in the background, let’s create a systemd service.
Create a service file:
sudo nano /etc/systemd/system/wikijs.service
Add the following content:
[Unit]
Description=Wiki.js
After=network.target

[Service]
Type=simple
User=root
WorkingDirectory=/usr/share/nginx/wikijs
ExecStart=/usr/bin/node server
Restart=always
Environment=NODE_ENV=production

[Install]
WantedBy=multi-user.target
Enable and start the service:
sudo systemctl daemon-reload
sudo systemctl enable --now wikijs
Now Wiki.js will automatically start at boot and can be managed with standard systemctl commands.
Step 9: Configure Nginx
Configure a reverse proxy for Wiki.js:
sudo nano /etc/nginx/conf.d/wikijs.conf
Add:
server {
    listen 80;
    server_name wiki.example.com;

    location / {
        proxy_pass http://localhost:3000;
        proxy_set_header Host $host;
        proxy_set_header X-Real-IP $remote_addr;
        proxy_set_header X-Forwarded-For $proxy_add_x_forwarded_for;
        proxy_set_header X-Forwarded-Proto $scheme;
    }
}
Replace wiki.example.com with our real domain.
Test and reload Nginx:
sudo nginx -t
sudo systemctl reload nginx
Step 10: Install Certbot
Certbot and its plugins are available via EPEL. Let’s install it first:
sudo dnf install -y epel-release
Install Certbot and Nginx plugin
sudo dnf install -y certbot python3-certbot-nginx
Now, let's obtain SSL Certificate. Replace wiki.example.com with our actual domain name (DNS A record should already point to this server).
sudo certbot --nginx -d wiki.example.com
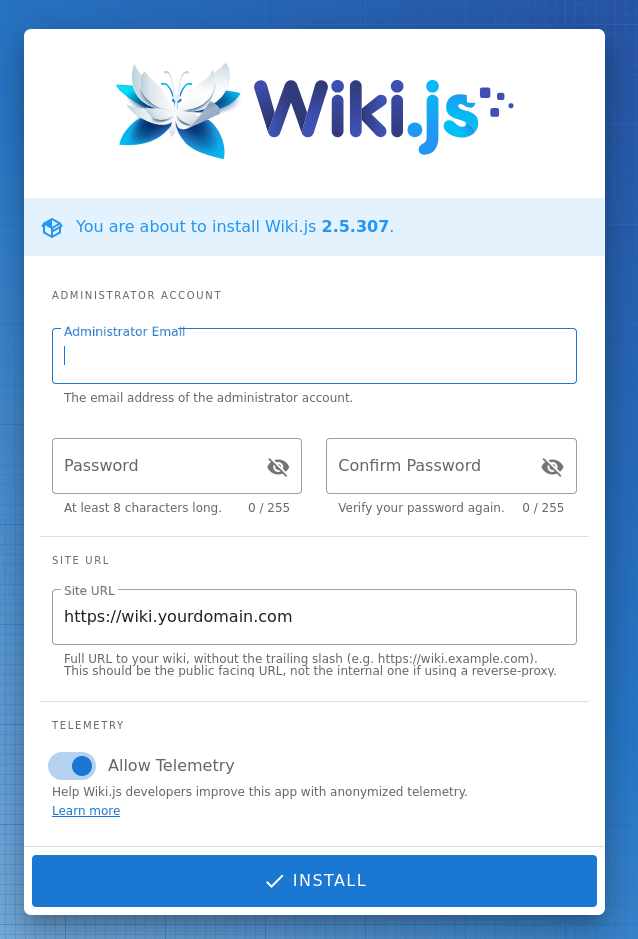
Step 11: Initial Wiki.js Web Setup
Visit our domain (or IP) in a browser. We’ll be guided through the initial setup—admin user creation, site name, and additional configurations. Everything from authentication providers (Google, GitHub, etc.) to visual themes can be managed here.
Tips for Managing and Upgrading Wiki.js
- Regular Backups: Use PostgreSQL’s built-in tools (pg_dump) to back up our database.
- Wiki.js Updates: Pull new releases from GitHub and re-run npm install --production.
- Extensions: Wiki.js supports powerful modules, including authentication, integrations, and custom themes.
- Performance: Running behind Nginx or Apache ensures better performance and security.
Final Thoughts
Setting up Wiki.js on AlmaLinux with Node.js and PostgreSQL provides a fast, flexible, and scalable platform for our documentation needs. This lightweight wiki can support our business, project, or community knowledge base with ease. By following these steps, we create a robust, professional documentation portal—ready to grow with our team.
